
Logistic regression is a type of regression that predicts the probability of an event. It is used for classification problems and has many applications in the fields of machine learning, artificial intelligence, and data mining.
The formula of logistic regression is to apply a sigmoid function to the output of a linear function. This article discusses how you can build a logistic regression classifier. While previously you have been working on a single-varable dataset, here we’ll be using a popular MNIST dataset to train and test our model. After going through this article, you’ll learn:
- How to use logistic regression in PyTorch and how it can be applied to real-world problems.
- How to load and analyze torchvision datasets.
- How to build and train a logistic regression classifier on image datasets.
Kick-start your project with my book Deep Learning with PyTorch. It provides self-study tutorials with working code.
Let’s get started.

Building a Logistic Regression Classifier in PyTorch.
Picture by Catgirlmutant. Some rights reserved.
Overview
This tutorial is in four parts; they are
- The MNIST Dataset
- Load Dataset into DataLoader
- Build the Model with
nn.Module - Training the Classifier
The MNIST Dataset
You will train and test a logistic regression model with MNIST dataset. This dataset contains 6000 images for training and 10000 images for testing the out-of-sample performance.
The MNIST dataset is so popular that it is part of PyTorch. Here is how you can load the training and testing samples of the MNIST dataset in PyTorch.
|
1 2 3 4 5 6 7 8 9 10 11 12 13 |
import torch import torchvision.transforms as transforms from torchvision import datasets # loading training data train_dataset = datasets.MNIST(root='./data', train=True, transform=transforms.ToTensor(), download=True) #loading test data test_dataset = datasets.MNIST(root='./data', train=False, transform=transforms.ToTensor()) |
The dataset will be downloaded and extracted to the directory as below.
|
1 2 3 4 5 6 7 8 9 10 11 12 13 14 15 16 17 18 19 |
Downloading http://yann.lecun.com/exdb/mnist/train-images-idx3-ubyte.gz Downloading http://yann.lecun.com/exdb/mnist/train-images-idx3-ubyte.gz to ./data/MNIST/raw/train-images-idx3-ubyte.gz 0%| | 0/9912422 [00:00<?, ?it/s] Extracting ./data/MNIST/raw/train-images-idx3-ubyte.gz to ./data/MNIST/raw Downloading http://yann.lecun.com/exdb/mnist/train-labels-idx1-ubyte.gz Downloading http://yann.lecun.com/exdb/mnist/train-labels-idx1-ubyte.gz to ./data/MNIST/raw/train-labels-idx1-ubyte.gz 0%| | 0/28881 [00:00<?, ?it/s] Extracting ./data/MNIST/raw/train-labels-idx1-ubyte.gz to ./data/MNIST/raw Downloading http://yann.lecun.com/exdb/mnist/t10k-images-idx3-ubyte.gz Downloading http://yann.lecun.com/exdb/mnist/t10k-images-idx3-ubyte.gz to ./data/MNIST/raw/t10k-images-idx3-ubyte.gz 0%| | 0/1648877 [00:00<?, ?it/s] Extracting ./data/MNIST/raw/t10k-images-idx3-ubyte.gz to ./data/MNIST/raw Downloading http://yann.lecun.com/exdb/mnist/t10k-labels-idx1-ubyte.gz Downloading http://yann.lecun.com/exdb/mnist/t10k-labels-idx1-ubyte.gz to ./data/MNIST/raw/t10k-labels-idx1-ubyte.gz 0%| | 0/4542 [00:00<?, ?it/s] Extracting ./data/MNIST/raw/t10k-labels-idx1-ubyte.gz to ./data/MNIST/raw |
Let’s verify number of training and testing samples in the dataset.
|
1 2 |
print("number of training samples: " + str(len(train_dataset)) + "\n" + "number of testing samples: " + str(len(test_dataset))) |
It prints
|
1 2 |
number of training samples: 60000 number of testing samples: 10000 |
Each sample in the dataset is a pair of image and label. To inspect the data type and size of the first element in the training data, you can use type() and size() methods.
|
1 2 |
print("datatype of the 1st training sample: ", train_dataset[0][0].type()) print("size of the 1st training sample: ", train_dataset[0][0].size()) |
This prints
|
1 2 |
datatype of the 1st training sample: torch.FloatTensor size of the 1st training sample: torch.Size([1, 28, 28]) |
You can access samples from a dataset using list indexing. The first sample in the dataset is a FloatTensor and it is a $28\times 28$-pixel image in grayscale (i.e., one channel), hence the size [1, 28, 28].
Now, let’s check the labels of the first two samples in the training set.
|
1 2 3 |
# check the label of first two training sample print("label of the first taining sample: ", train_dataset[0][1]) print("label of the second taining sample: ", train_dataset[1][1]) |
This shows
|
1 2 |
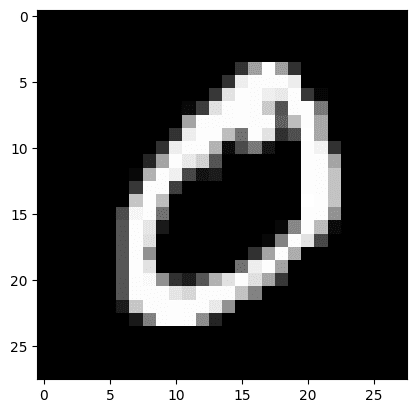
label of the first taining sample: 5 label of the second taining sample: 0 |
From the above, you can see that the first two images in the training set represent “5” and “0”. Let’s show these two images to confirm.
|
1 2 3 4 5 6 |
img_5 = train_dataset[0][0].numpy().reshape(28, 28) plt.imshow(img_5, cmap='gray') plt.show() img_0 = train_dataset[1][0].numpy().reshape(28, 28) plt.imshow(img_0, cmap='gray') plt.show() |
You should see these two digits: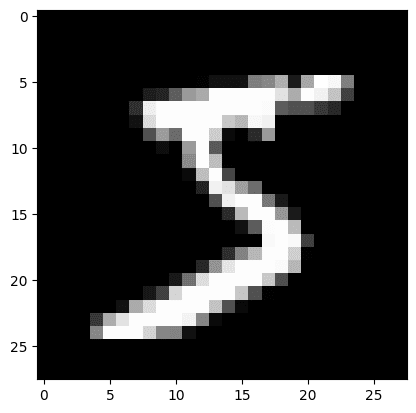
Load Dataset into DataLoader
Usually, you do not use the dataset directly in training but through a DataLoader class. This allows you to read data in batches, not samples.
In the following, data is loaded into a DataLoader with batch size at 32.
|
1 2 3 4 5 6 7 |
... from torch.utils.data import DataLoader # load train and test data samples into dataloader batach_size = 32 train_loader = DataLoader(dataset=train_dataset, batch_size=batach_size, shuffle=True) test_loader = DataLoader(dataset=test_dataset, batch_size=batach_size, shuffle=False) |
Want to Get Started With Building Transformer Models with Attention?
Take my free 12-day email crash course now (with sample code).
Click to sign-up and also get a free PDF Ebook version of the course.
Build the Model with nn.Module
Let’s build the model class with nn.Module for our logistic regression model. This class is similar to that in the previous posts but the numbers of input and output are configurable.
|
1 2 3 4 5 6 7 8 9 10 |
# build custom module for logistic regression class LogisticRegression(torch.nn.Module): # build the constructor def __init__(self, n_inputs, n_outputs): super(LogisticRegression, self).__init__() self.linear = torch.nn.Linear(n_inputs, n_outputs) # make predictions def forward(self, x): y_pred = torch.sigmoid(self.linear(x)) return y_pred |
This model will take a $28\times 28$-pixel image of handwritten digits as input and classify them into one of the 10 output classes of digits 0 to 9. So, here is how you can instantiate the model.
|
1 2 3 4 |
# instantiate the model n_inputs = 28*28 # makes a 1D vector of 784 n_outputs = 10 log_regr = LogisticRegression(n_inputs, n_outputs) |
Training the Classifier
You will train this model with stochastic gradient descent as the optimizer with learning rate 0.001 and cross-entropy as the loss metric.
Then, the model is trained for 50 epochs. Note that you have use view() method to flatten the image matrices into rows to fit the same of the logistic regression model input.
|
1 2 3 4 5 6 7 8 9 10 11 12 13 14 15 16 17 18 19 20 21 22 23 24 25 26 27 |
... # defining the optimizer optimizer = torch.optim.SGD(log_regr.parameters(), lr=0.001) # defining Cross-Entropy loss criterion = torch.nn.CrossEntropyLoss() epochs = 50 Loss = [] acc = [] for epoch in range(epochs): for i, (images, labels) in enumerate(train_loader): optimizer.zero_grad() outputs = log_regr(images.view(-1, 28*28)) loss = criterion(outputs, labels) # Loss.append(loss.item()) loss.backward() optimizer.step() Loss.append(loss.item()) correct = 0 for images, labels in test_loader: outputs = log_regr(images.view(-1, 28*28)) _, predicted = torch.max(outputs.data, 1) correct += (predicted == labels).sum() accuracy = 100 * (correct.item()) / len(test_dataset) acc.append(accuracy) print('Epoch: {}. Loss: {}. Accuracy: {}'.format(epoch, loss.item(), accuracy)) |
During training, you should see the progress like the following:
|
1 2 3 4 5 6 7 8 9 10 11 12 |
Epoch: 0. Loss: 2.211054563522339. Accuracy: 61.63 Epoch: 1. Loss: 2.1178536415100098. Accuracy: 74.81 Epoch: 2. Loss: 2.0735440254211426. Accuracy: 78.47 Epoch: 3. Loss: 2.040225028991699. Accuracy: 80.17 Epoch: 4. Loss: 1.9637292623519897. Accuracy: 81.05 Epoch: 5. Loss: 2.000900983810425. Accuracy: 81.44 ... Epoch: 45. Loss: 1.6549798250198364. Accuracy: 86.3 Epoch: 46. Loss: 1.7053509950637817. Accuracy: 86.31 Epoch: 47. Loss: 1.7396119832992554. Accuracy: 86.36 Epoch: 48. Loss: 1.6963073015213013. Accuracy: 86.37 Epoch: 49. Loss: 1.6838685274124146. Accuracy: 86.46 |
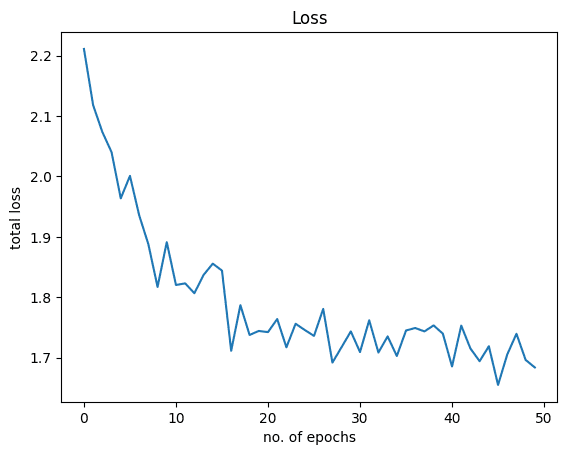
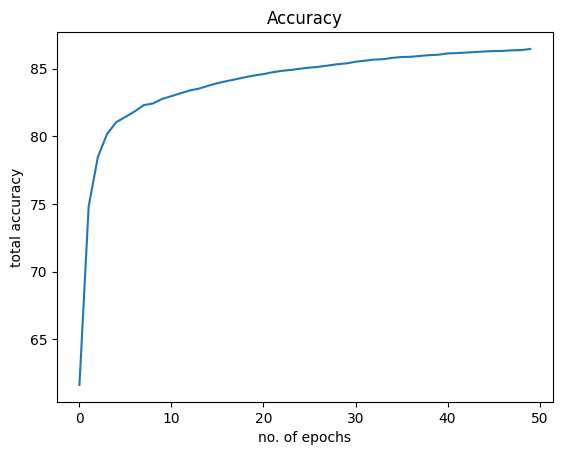
You have achieved an accuracy of around 86% by training the model for only 50 epochs. Accuracy can be improved further if the model is trained longer.
Let’s visualize how the graphs for loss and accuracy look like. The following is the loss:
|
1 2 3 4 5 |
plt.plot(Loss) plt.xlabel("no. of epochs") plt.ylabel("total loss") plt.title("Loss") plt.show() |
And this is for accuracy:
|
1 2 3 4 5 |
plt.plot(acc) plt.xlabel("no. of epochs") plt.ylabel("total accuracy") plt.title("Accuracy") plt.show() |
Putting everything together, the following is the complete code:
|
1 2 3 4 5 6 7 8 9 10 11 12 13 14 15 16 17 18 19 20 21 22 23 24 25 26 27 28 29 30 31 32 33 34 35 36 37 38 39 40 41 42 43 44 45 46 47 48 49 50 51 52 53 54 55 56 57 58 59 60 61 62 63 64 65 66 67 68 69 70 71 72 73 74 75 76 77 78 79 80 81 82 83 84 85 86 87 88 89 90 |
import torch import torchvision.transforms as transforms from torchvision import datasets from torch.utils.data import DataLoader import matplotlib.pyplot as plt # loading training data train_dataset = datasets.MNIST(root='./data', train=True, transform=transforms.ToTensor(), download=True) # loading test data test_dataset = datasets.MNIST(root='./data', train=False, transform=transforms.ToTensor()) print("number of training samples: " + str(len(train_dataset)) + "\n" + "number of testing samples: " + str(len(test_dataset))) print("datatype of the 1st training sample: ", train_dataset[0][0].type()) print("size of the 1st training sample: ", train_dataset[0][0].size()) # check the label of first two training sample print("label of the first taining sample: ", train_dataset[0][1]) print("label of the second taining sample: ", train_dataset[1][1]) img_5 = train_dataset[0][0].numpy().reshape(28, 28) plt.imshow(img_5, cmap='gray') plt.show() img_0 = train_dataset[1][0].numpy().reshape(28, 28) plt.imshow(img_0, cmap='gray') plt.show() # load train and test data samples into dataloader batach_size = 32 train_loader = DataLoader(dataset=train_dataset, batch_size=batach_size, shuffle=True) test_loader = DataLoader(dataset=test_dataset, batch_size=batach_size, shuffle=False) # build custom module for logistic regression class LogisticRegression(torch.nn.Module): # build the constructor def __init__(self, n_inputs, n_outputs): super().__init__() self.linear = torch.nn.Linear(n_inputs, n_outputs) # make predictions def forward(self, x): y_pred = torch.sigmoid(self.linear(x)) return y_pred # instantiate the model n_inputs = 28*28 # makes a 1D vector of 784 n_outputs = 10 log_regr = LogisticRegression(n_inputs, n_outputs) # defining the optimizer optimizer = torch.optim.SGD(log_regr.parameters(), lr=0.001) # defining Cross-Entropy loss criterion = torch.nn.CrossEntropyLoss() epochs = 50 Loss = [] acc = [] for epoch in range(epochs): for i, (images, labels) in enumerate(train_loader): optimizer.zero_grad() outputs = log_regr(images.view(-1, 28*28)) loss = criterion(outputs, labels) # Loss.append(loss.item()) loss.backward() optimizer.step() Loss.append(loss.item()) correct = 0 for images, labels in test_loader: outputs = log_regr(images.view(-1, 28*28)) _, predicted = torch.max(outputs.data, 1) correct += (predicted == labels).sum() accuracy = 100 * (correct.item()) / len(test_dataset) acc.append(accuracy) print('Epoch: {}. Loss: {}. Accuracy: {}'.format(epoch, loss.item(), accuracy)) plt.plot(Loss) plt.xlabel("no. of epochs") plt.ylabel("total loss") plt.title("Loss") plt.show() plt.plot(acc) plt.xlabel("no. of epochs") plt.ylabel("total accuracy") plt.title("Accuracy") plt.show() |
Summary
In this tutorial, you learned how to build a multi-class logistic regression classifier in PyTorch. Particularly, you learned.
- How to use logistic regression in PyTorch and how it can be applied to real-world problems.
- How to load and analyze torchvision datasets.
- How to build and train a logistic regression classifier on image datasets.
Get Started on Deep Learning with PyTorch!

Learn how to build deep learning models
...using the newly released PyTorch 2.0 library
Discover how in my new Ebook:
Deep Learning with PyTorch
It provides self-study tutorials with hundreds of working code to turn you from a novice to expert. It equips you with
tensor operation, training, evaluation, hyperparameter optimization,
and much more...


Thank you for the excellent tutorial!
You are very welcome Eduardo! We appreciate your feedback and support.
Nice and very didactic tutorial, thanks!
But I have a question. Torch CrossEntropyLoss is used, that includes internally a softmax step. So, this is rather an example of softmax classification (appropriate to multi class) than logistic regression one (appropriate to binary classification).
In fact I get better accuracy if I remove the sigmoid step at the forward function.
As I am a newcomer in this field, can you comment on this?
Hi Alberto…You are correct! Binary classification is a subset to multiclass classification so your results make sense.
I think that this implementation is wrong.
The sigmoids should be removed and CrossEntropyLoss should be replaced with BCEWithLogitsLoss.
In fact, CrossEntropyLoss internally applies the softmax while BCEWithLogitsLoss internally applies sigmoid.
Hi Marco…Thank you for your feedback! Can you provide more detail as to the results you are receiving that confirm that the implementation is wrong?
Hi James,
If you look at the CrossEntropyLoss pydoc (https://pytorch.org/docs/stable/generated/torch.nn.CrossEntropyLoss.html) you see that the input is expected to be the unnormalized logits for each class. So, basically, in a simple single dense layer network, it should be the output of a linear layer. In your example, instead, the input is the output of a sigmoid. This last step is not needed since it is already applied by CrossEntropyLoss. Your example is pratically like y=loss(softmax(sigmoid(x)).
I fully agree with the comment of Marco F. The model is currently not correct.
Just for fun, I tried it out on the IRIS dataset and compared it it to logistic regression with sklearn.
When you remove the sigmoid part from the model you get exactly the same loss as with the library of sklearn However, with the sigmoid function you get different (and actually very bad) results.
Thank you for your feedback Clemens!
Why is this still up when it’s wrong, as multiple commenters have pointed out?